Table of Contents
Writing Scans Tutorial 2
This tutorial will walk you step-by-step through writing a Golden Cross scan to run from the Advanced Scan Workbench. In our previous tutorial, we created a scan using fairly simple clauses. In this tutorial, we will build on that knowledge and learn some more complex scan syntax.
Our scanning tutorials assume only a basic knowledge of common technical indicators and chart patterns. This tutorial may build on skills learned in prior scanning tutorials (links are provided where appropriate).
By the end of this tutorial, you will be able to write a scan using more complex scan syntax, including crossover clauses and arithmetic functions, as well as be able to add explanatory comments to your scan clauses. Once you've mastered these skills, be sure to check out our other scanning tutorials to learn about and practice other aspects of scanning.
Tip: We recommend printing out this page or opening it in another tab so that you can refer to it as you follow along on your computer.
Adding Comments to Your Scan
Step 1:
Open the Advanced Scan Workbench and add the following scan clauses in the Scan Editor Box:
[type is stock] and [sma(20,volume) > 40000]
AND [country is US]
AND [close > 10]
These clauses are very similar to the universe-defining clauses we created in our first tutorial on writing scans. If you need to brush up on your scan syntax, we recommend starting with that tutorial before completing this one.
Step 2:
Click the “Check Syntax” button to make sure everything has been typed in correctly, then click “Run Scan”.
If you are not familiar with the process for running a scan in the Advanced Scan Workbench, we recommend accessing our tutorial on this topic, which will help you build and run the scan listed above.
Step 3:
Check out the scan results in the new browser window (or new tab in your current browser window) that opens up. This scan is expected to get the max of 2000 results. We will need to narrow it down further later in the tutorial.
Before we do that, let's look at adding some comments to the scan. These informational notes are not read by the scan engine; they are purely for you, to help you remember what each clause does when you look at the scan later.
Comments should have two forward slashes at the beginning of the line. Any text on that line after those forward slashes will be ignored by the scan engine.
Step 4:
Try adding a comment before each of the three lines of scan criteria we have in our scan right now, explaining what that line does. Once this is completed, your scan may look something like this:
// Stocks that traded at least 40K shares daily this last month
[type is stock] and [sma(20,volume) > 40000]
// US stocks only
AND [country is US]
// Current close must be above $10
AND [close > 10]
These are very simple clauses, so maybe the comments are not strictly necessary for some of them, but it is a good habit to have. You'll thank yourself when you're trying to decipher a complex scan several months after you wrote it.
Step 5:
Click the “Check Syntax” button, then click “Run Scan” to confirm that the comments you added have not changed the results you get.
Adding the Golden Cross Clauses to the Scan
A Golden Cross is a signal given when a shorter-term moving average (MA) moves above a longer-term moving average - typically the 50-day MA moving above the 200-day MA. How can we scan for this signal? If the 50-day MA has crossed above the 200-day MA today, that means today's 50-day MA value is greater than the 200-day MA value. It also means that yesterday's 50-day MA value was less than yesterday's 200-day MA, since the crossover hadn't happened yet.
We can add two clauses that scan for these two situations.
Step 6:
Click inside the Scan Editor Box and add the following text at the end of the scan:
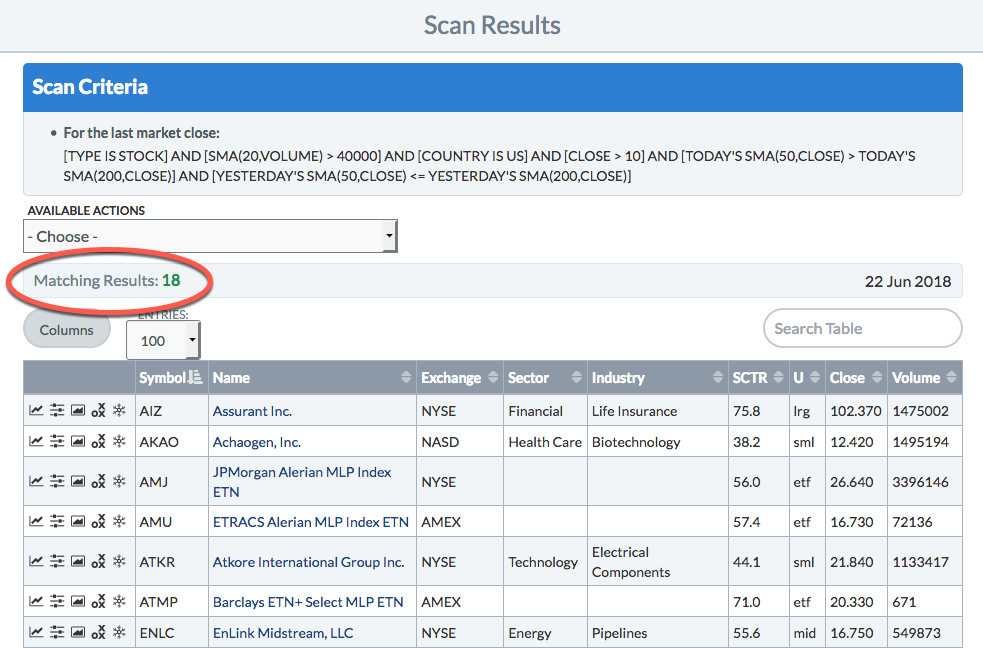
// Golden Cross - 50-day SMA crosses above 200-day SMA
and [today's SMA(50,close) > today's SMA(200,close)]
and [yesterday's SMA(50,close) <= yesterday's SMA(200,close)]
Let's take a closer look at these clauses. First, notice that we have added “today's” or “yesterday's” to the beginning of some of the scan expressions. This tells the scan engine to look at the value for that expression on that particular day. If you don't specify a date modifier, the scan engine will assume you want today's value.
Here we are using the SMA (simple moving average) indicator, which has two parameters. The first shows the number of periods to use in calculating the moving average. The second indicates what data you want to calculate the moving average of. By default, the close is used, but you can calculate moving averages of the open, the volume or even another indicator.
Notice also that, for the first time, we are comparing an indicator to another indicator in our scan clauses. Up to this point, we've been comparing to a static number or text, but scan clauses can be used to compare all kinds of different values.
Note: You can also add a simple moving average clause to your scan by choosing “SMA” from the “Technical Indicators” menu in the Scan Components area of the workbench and clicking “Add.” This inserts a sample scan clause for limiting results based on the 50-day simple moving average (SMA) of volume. You may need to manually change the parameters used for this default clause.
Step 7:
Click the “Check Syntax” button to make sure everything has been typed in correctly, then click “Run Scan”. Take note of how the number of results changed when you added these two clauses.
Using Crossover Clauses
In technical analysis, one line crossing another is often a meaningful signal. Our initial Golden Cross criteria contained two clauses to find this crossover event, but there is a shortcut - the “Crosses Above” operator (signified by the “x”), which will do this in only one clause.
Step 8:
Remove the two Golden Cross clauses added in Step 6. Replace them with the following text:
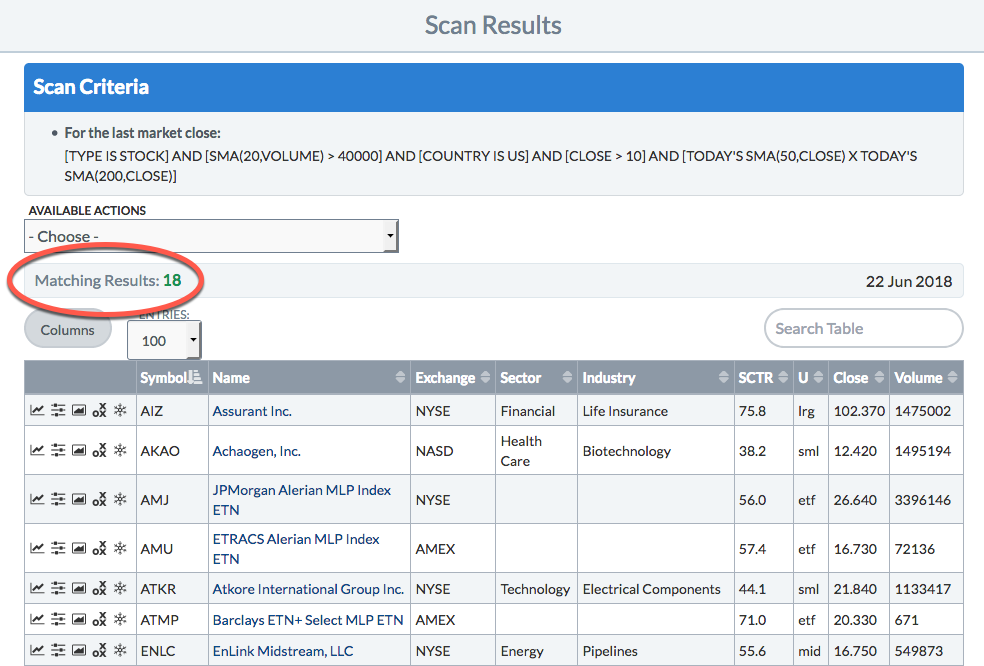
and [today's sma(50,close) x today's sma(200,close)]
This crossover clause checks to see if the 50-day SMA has crossed above the 200-day SMA today. This single clause says the exact same thing as the previous two clauses: today the 50-day SMA is above the 200-day SMA, yesterday it was not. Since crossover signals are so widely used in technical analysis, the Crosses Above operator is a great shortcut to scan for this type of signal.
Step 9:
Click the “Check Syntax” button to ensure all of the scan clauses are correct, then click “Run Scan”. Notice that the number of results has not changed, since the Crosses Above clause checks for the exact same criteria as the two separate clauses.
For more information on scanning for crossovers, check out our Support Center article on that topic.
Using Arithmetic Functions in Scans
We've built our basic Golden Cross scan, but we can add a couple more clauses to really fine-tune our results. For example, we may only care about a Golden Cross if it occurs with strong volume. Since volume varies so much from stock to stock, it's not really practical to scan for a specific number of shares (e.g. [volume > 25000000]). We could just check whether volume is greater than the previous day (e.g. [today's volume > yesterday's volume]), but, with arithmetic functions, we can be much more specific about the magnitude of the volume increase.
Step 10:
Click in the Scan Editor Box and add the following text at the end of the scan:
// Volume up 50% from yesterday
and [volume > yesterday's volume * 1.5]
This clause says that today's volume is greater than yesterday's volume multiplied by 1.5. In other words, today's volume is at least 50% more than yesterday's volume. Now we are being much more precise about how strong the volume increase needs to be.
Step 11:
Click the “Check Syntax” button again, then click “Run Scan” and check out the results.

Finishing Up the Scan
Since we're only interested in stocks where the price is rising, we need to add one last clause to our scan.
Step 12:
Click in the Scan Editor Box and add the following text to the end of the scan:
// Price is going up!
and [close > yesterday's close]
This is a simple clause, but can make all the difference in our scan, weeding out stocks that are dropping in price and of no interest to us.
Step 13:
Click the “Check Syntax” button, then click “Run Scan” one last time to see if this clause changed the results.
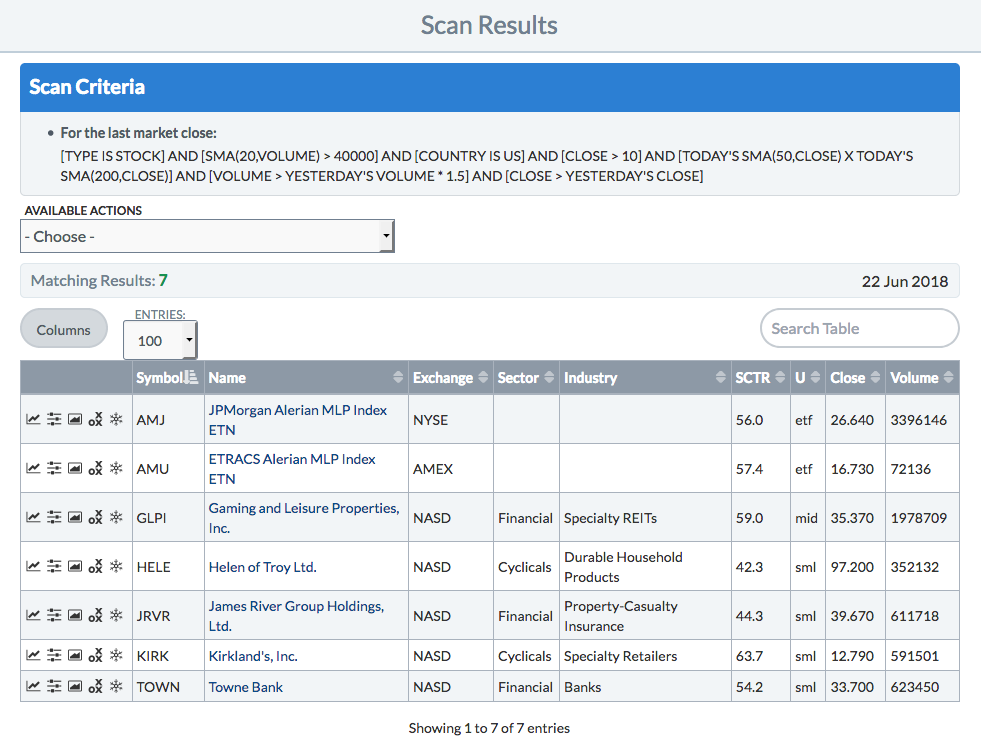
In the example above, adding this clause did not change the results; all the stocks returned by the previous version of the scan were already going up in price.
The final version of your scan should read like this:
// Stocks that traded at least 40K shares daily this last month
[type is stock] and [sma(20,volume) > 40000]

// US stocks only
AND [country is US]

// Current close must be above $10
AND [close > 10]

// Golden Cross - 50-day SMA crosses above 200-day SMA
and [today's sma(50,close) x today's sma(200,close)]

// Volume up 50% from yesterday
and [volume > yesterday's volume * 1.5]

// Price is going up!
and [close > yesterday's close]
Notice that those comments make it easy to see at a glance what each clause does.
Step 14:
Once you are happy with your scan, be sure to save it, so you can easily run it again at a later date.
If you are not familiar with the process for saving your scan in the Advanced Scan Workbench, we recommend accessing our first Writing Scans Tutorial, which will walk you step by step through saving your scan.
Learn More
Now that you've learned some more advanced techniques for writing scans, check out our Troubleshooting Scans Tutorial to learn more about how to fix your scan when it is not returning the results you expect.
For more in-depth information on writing scans, please check out our Writing Scans article in the Support Center.