Table of Contents
Customizing Predefined Scans
On our Predefined Scans page, we show the results of over 60 scans that we run each day after the market closes. While this report is useful, what many people don't realize is that StockCharts members can load any of these predefined scans into our Advanced Scan Workbench for examination and modification. In this article, we'll walk you step-by-step through viewing the nuts and bolts of the “Strong Volume Gainers” predefined scan, and customizing it to better meet your needs.
Accessing Predefined Scan Results
Step 1:
First, load the Predefined Scan Results report, by clicking on Charts & Tools at the top of any of our web pages, then clicking on Predefined Scans in the Additional Tools & Reports menu on the right side of the page.
Step 2:
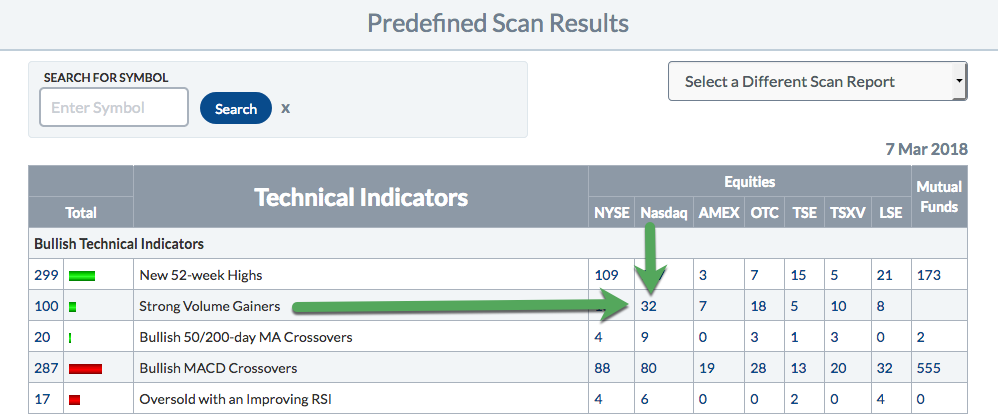
For this exercise, we'll be looking at the Strong Volume Gainers report for stocks that trade on the NASDAQ Exchange. Find Strong Volume Gainers on the list, and click on the number in the NASDAQ column for that scan. In this case, the number is 32.
Loading the Scan in the Workbench
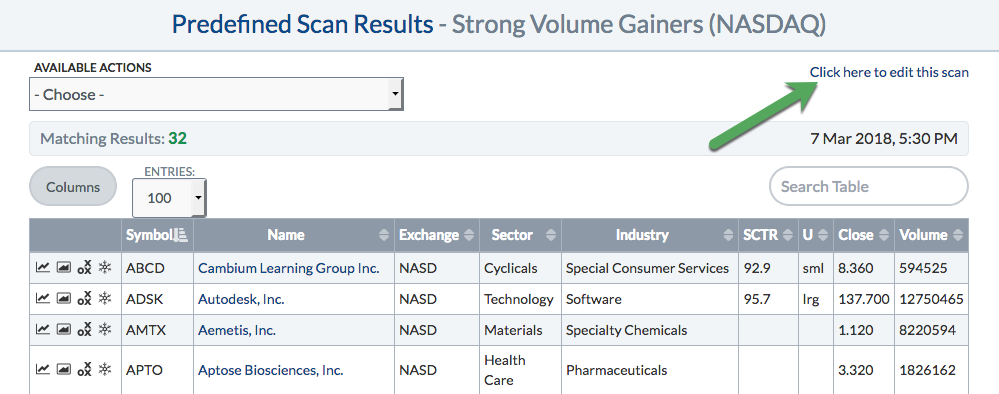
When you click the number in Step 2, it takes you to a list of the ticker symbols that meet that scan criteria. But how do we find out what those scan criteria are?
Step 3:
Click the “Click here to edit this scan” link at the top right of the scan results page.
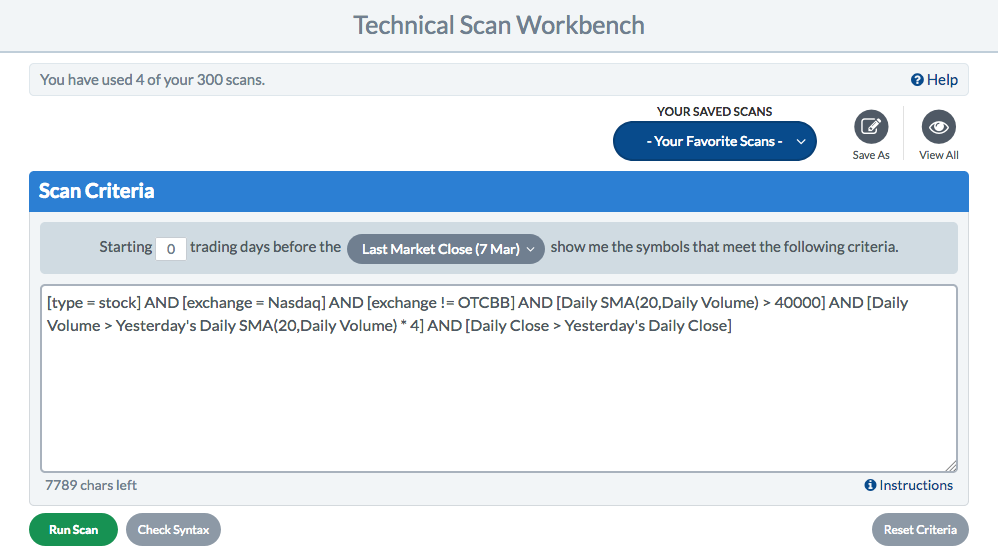
This will load the predefined scan criteria in the Advanced Scan Workbench. Since we loaded the scan from a Predefined Scan results page that was limited to NASDAQ-traded stocks, the scan includes universe-defining clauses limiting the results to the NASDAQ Exchange.
Customizing the Scan
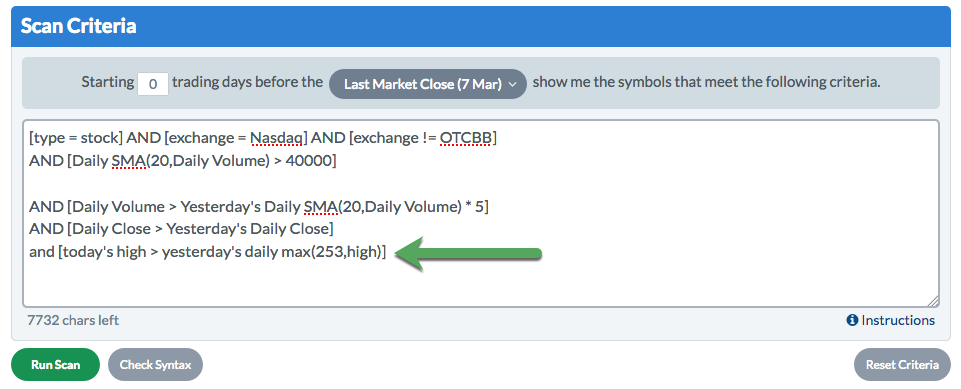
Reviewing the scan criteria, we can see that in the Strong Volume Gainers predefined scan, StockCharts defines strong volume as at least 4 times higher than the 20-day simple moving average of volume:
AND [Daily Volume > Yesterday's Daily SMA(20,Daily Volume) * 4]
Step 4:
If we would prefer to define strong volume as 5 times higher, that is easy to do. Simply change that “* 4” to “* 5” in your scan criteria:
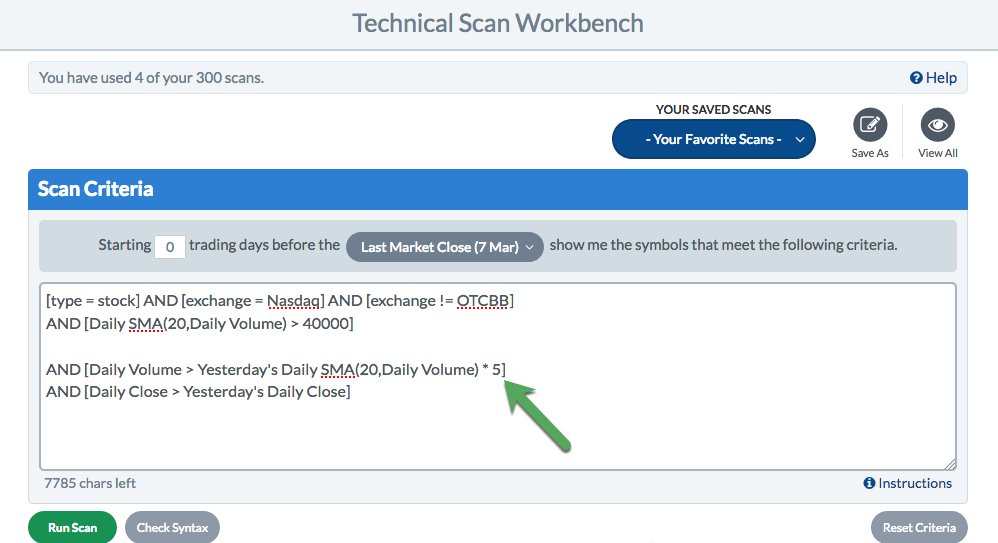
Notice that we also broke the scan into multiple lines, to make it easier to read.
Adding Predefined Scans from the Workbench
There is actually a second way to load predefined scans in the Advanced Scan Workbench, and this method adds them directly from the workbench. Let's say that we want to combine two predefined scans together: Strong Volume Gainers and New 52-Week Highs. We've already got the first one, but how can we add the scan criteria for the New 52-Week Highs predefined scan?
Step 5:
In the Scan Components area of the Advanced Scan Workbench, choose “New 52-Week High” from the Predefined Scans dropdown menu. All of the Predefined Scans used in the Predefined Scans report are listed in this menu.
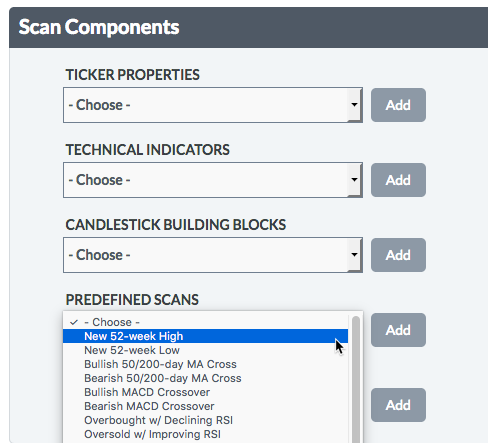
Step 6:
After you've selected the New 52-Week High predefined scan, click Add.
Notice that no universe-defining clauses are added in this case, since we are not loading the predefined scan from a predefined scan report. Adding it from the Advanced Scan Workbench adds only the clauses that directly relate to the 52-week highs.
Saving the Scan
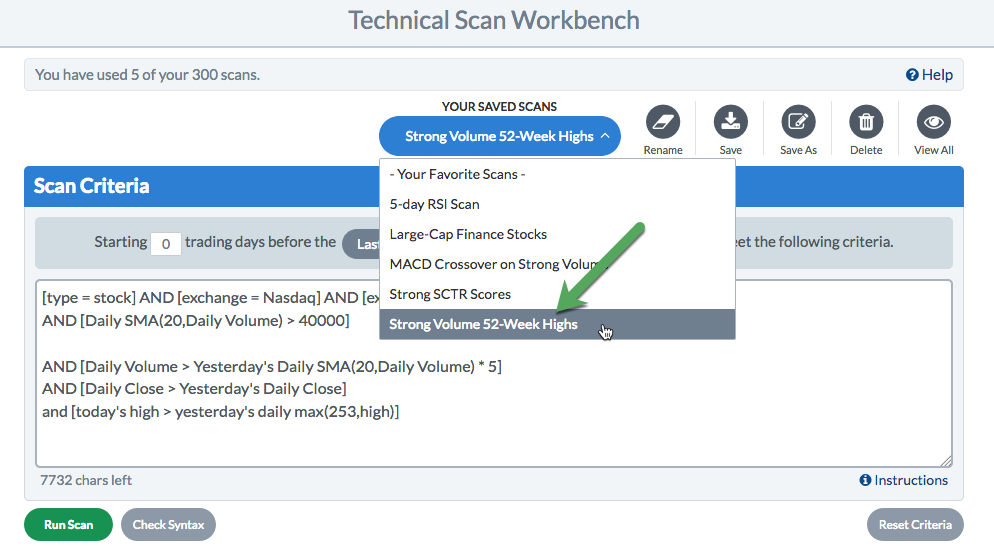
Once you're happy with your customizations, be sure to save the scan.
Step 7:
Save the scan by clicking the “Save As” button at the top of the workbench, entering a name for your scan, and clicking OK. We've chosen to save this scan using the name “Strong Volume 52-Week Highs”.
NOTE: Saving this scan does not make any changes to the original Predefined Scan at all. When you save the scan with your customizations, it becomes a new custom scan in your account.
Conclusions
Predefined Scans are a great way to learn about all that scanning has to offer. There are plenty of great examples of crossover scans, pattern scans, and trend-detection scans in the Predefined Scans collection, just waiting to be reviewed and customized.