Table of Contents
Troubleshooting Scans Tutorial 2
This tutorial will walk you step-by-step through troubleshooting a scan that is unexpectedly returning a very large number of results. In our previous tutorial, we looked at a scan that was returning no results, but, in this tutorial, we will tackle the opposite problem: a scan that is returning too many results, including some symbols that should not be included at all.
Our scanning tutorials assume only a basic knowledge of common technical indicators and chart patterns. This tutorial may build on skills learned in prior scanning tutorials (links are provided where appropriate).
By the end of this tutorial, you will be able to troubleshoot a scan that returns far more results than expected, finding possible problems with the syntax as well as strategies to fix those problems. Once you've mastered these skills, be sure to check out our other scanning tutorials to learn about and practice other aspects of scanning.
Tip: We recommend printing out this page or opening it in another tab so that you can refer to it as you follow along on your computer.
Running the Scan
Step 1:
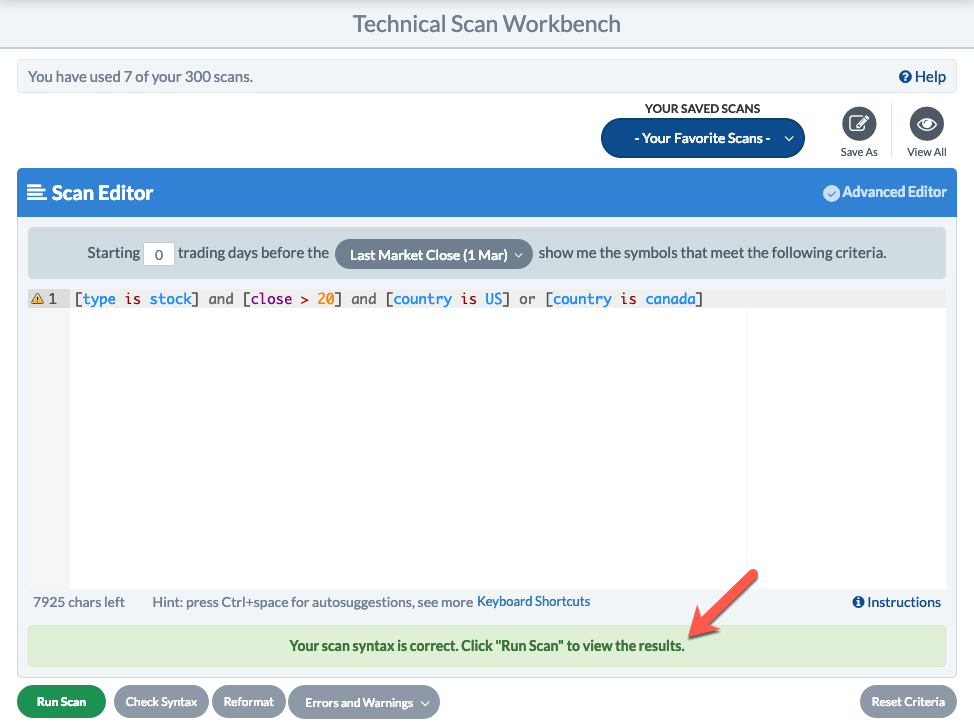
Open the Advanced Scan Workbench and add the following scan clauses in the Scan Editor Box:
[type is stock] and [close > 20] and [country is US] or [country is canada]
This is a very simple scan, searching for stocks with a closing price over 20 and traded in the US or Canada. We've kept the example scan very simple for ease of troubleshooting; in real-life scans, the problem and solution may be much less obvious.
Step 2:
Click the “Check Syntax” button to make sure everything has been typed in correctly, then click “Run Scan”.
If you are not familiar with the process for running a scan in the Advanced Scan Workbench, we recommend accessing our tutorial on this topic, which will help you build and run scans like the one listed above.
Step 3:
Check out the scan results in the new browser window (or new tab in your current browser window) that opens up. Notice that 999 results are returned - the maximum number of results that can be displayed. What's even more surprising is that there are stocks in the results whose price is less than $20, and even some indexes (non-stocks). Something is wrong with our scan.
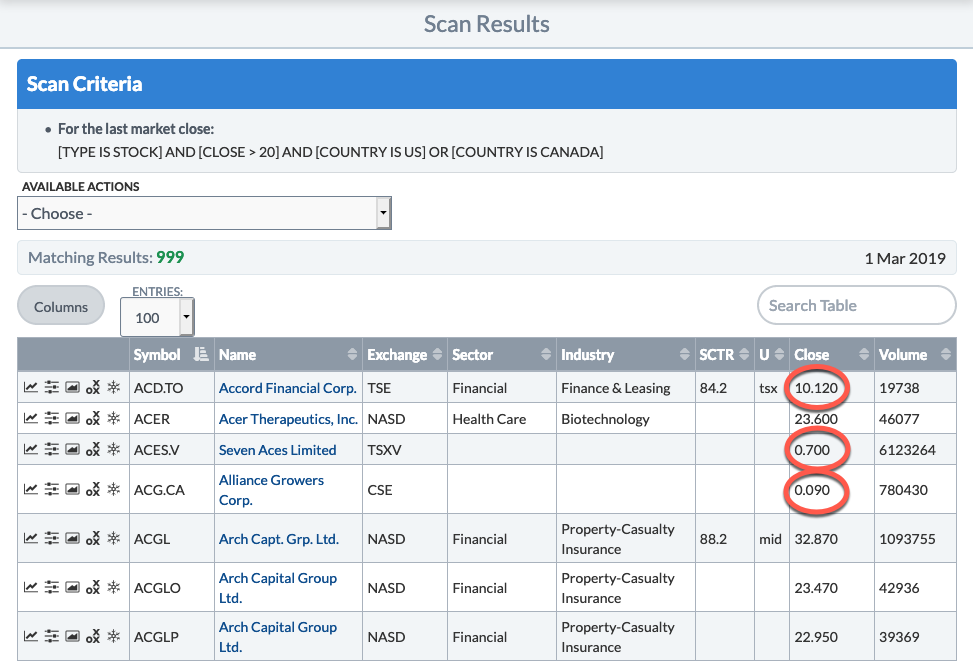
Note: At the time this tutorial was created, members were limited to 999 scan results; that limit is now 2000 results.
Narrowing the Results
In our previous tutorial on troubleshooting scans, we would remove clauses from the scan in order to determine which clause was causing the problem, but that technique is not useful here. We're already getting too many results; removing clauses from the scan will just give us even more results. To determine the problem with this scan, we'll need to try adding or modifying clauses to determine the problem.
Sometimes getting too many results is just a matter of not including enough clauses in your scan. In order to properly narrow down your result set to a manageable number, you'll need to add more restrictive clauses to your scan, which will reduce the number of symbols that match all of your criteria.
For more information on choosing the type of clauses to add to your scan, check out our Planning Scans article in the Support Center.
Step 4:
Add a signal clause at the end of your scan, which should significantly narrow down the number of results:
and [RSI(14) x 85.0]
The clause above specifies that the RSI value for the stock has to have crossed above 85 today. This may not be how you want to limit your scan results, but it is a good test to see if there is something else wrong with the scan. Normally, we would expect a scan with this clause added to get far fewer than the max number of allowed results.
Step 5:
Click the “Check Syntax” button, then click “Run Scan” and check out the scan results.
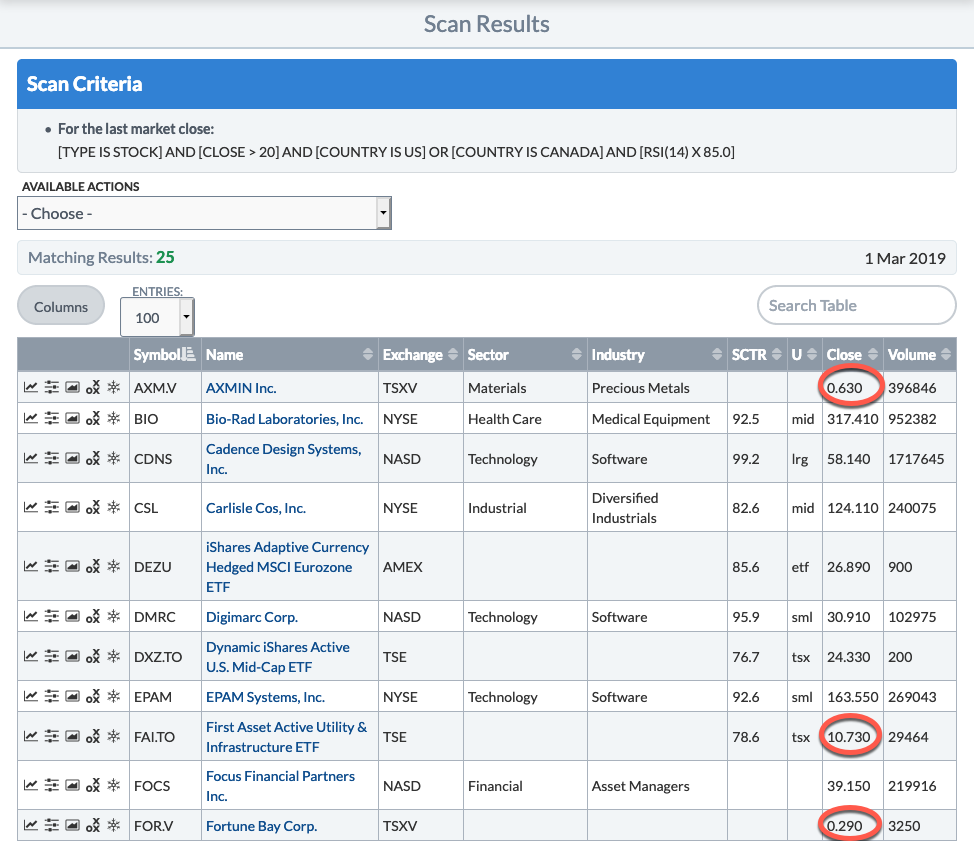
If the problem with our original scan was that the clauses weren't narrowing the results enough, we would expect to see a much smaller number here, which is exactly the case. However, this can't be the only problem with our scan, because we're still seeing stocks in the results whose price is below $20.
When a scan is getting results that do not appear to meet your criteria, the culprit is often an “OR” clause.
Checking for OR Clause Issues
OR clauses are often a good place to check when you're troubleshooting unexpected scan results, as they are a very common source of scan issues. You can learn all about OR clauses in our Support Center article on the topic, but we'll cover the basics here.
Essentially, the OR operator is used to string together a list of clauses where, if any one of the clauses is true, the symbol will be included in the results. This is handy for things like scanning for stocks that are traded on either the NYSE or the Nasdaq (they don't have to be traded on both exchanges, just one of them).
When using OR clauses, it is easy for the scan engine to get confused about which clauses are part of your list of OR clauses and which are not. In fact, in our example above, the scan engine is assuming that the Type and Close clauses are part of your list and that they're extra side requirements for the US clause that's next to them. As far as the scan engine is concerned, the two items on your OR clause list are:
- US stocks over $20: [type is stock] and [close > 20] and [country is US]
- All Canada symbols, regardless of price or type: [country is canada]
We can test this theory by adding a single set of brackets around the Type, Close and US clauses, to explicitly tell the scan engine those three clauses are grouped together.
Step 6:
Add an extra set of brackets around the Type, Close and US clauses, like this:
[[type is stock] and [close > 20] and [country is US]]
Step 7:
Click the “Check Syntax” button, then click “Run Scan” and check out the scan results.
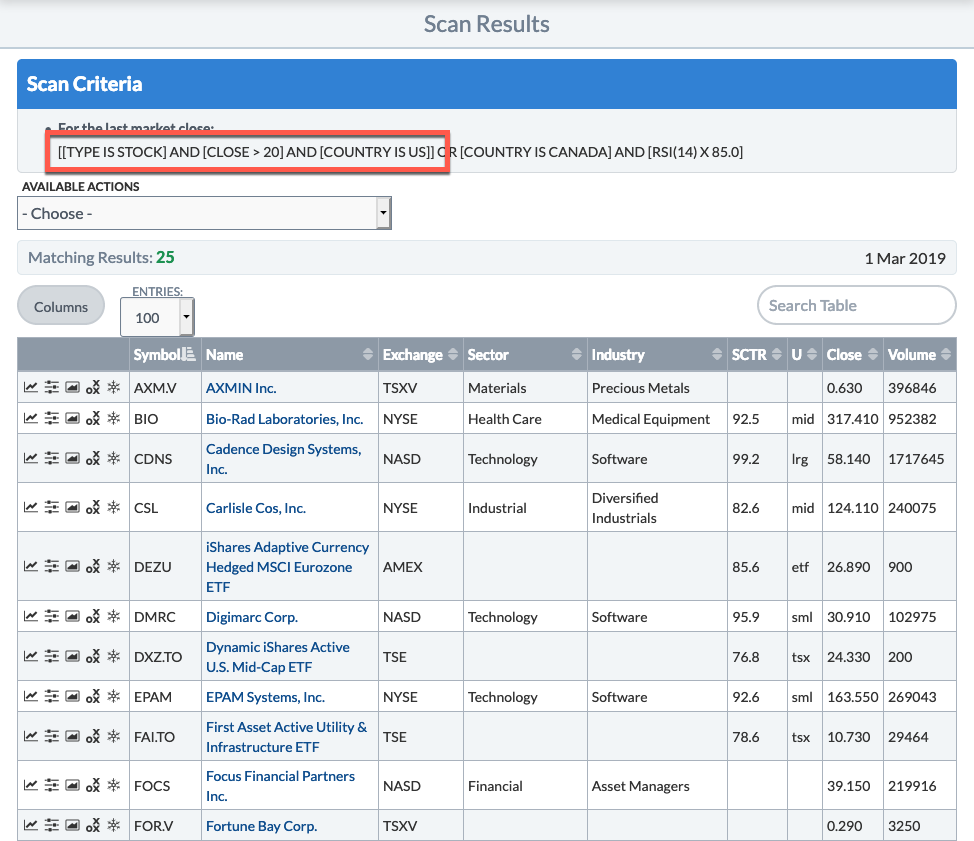
You can see that we're getting the same exact results that we were getting without the extra brackets. This supports our theory that the scan engine is including those Type and Close clauses in our OR clause list.
Correcting the OR Clause Issue
Because the scan engine may make incorrect assumptions, it is best to make your intentions totally clear to the scan engine about which clauses are on the OR clause list. To do this, we recommend putting an extra set of square brackets around just the clauses that should be included in the list.
Step 8:
Update the scan syntax to include extra brackets around the US and Canada clauses instead of the Type, Close and US clauses:
[type is stock] and [close > 20] and [[country is US] or [country is Canada]]
This tells the scan engine that the OR clause list is only checking whether the country is US or Canada. The type clause and the closing price clause are totally separate scan requirements.
Step 9:
Click the “Check Syntax” button, then click “Run Scan” and check out the scan results. Click to sort the scan results by closing price.
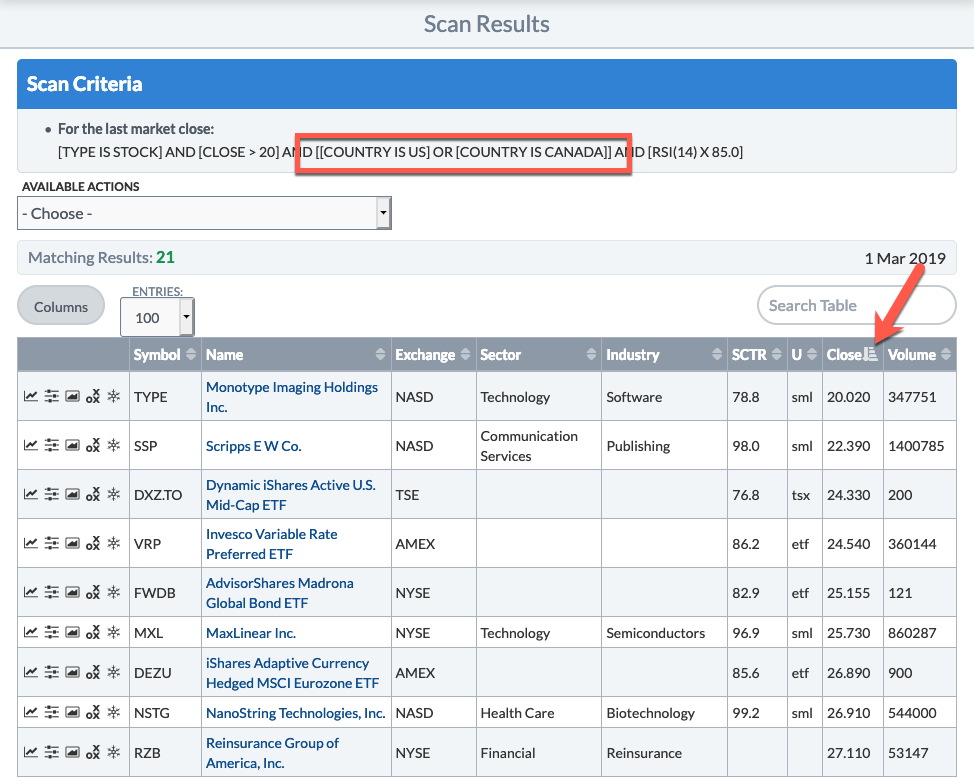
You can see from the screenshot that there are no indexes on the list, nor are there any symbols on the list with a closing price less than $20. You can also sort by exchange to see that all the stocks on the list are traded on US or Canadian exchanges. With those extra brackets, the scan engine is now interpreting your scan the way you want, which means you're getting the results you would expect.
Step 10:
Once you are happy with your scan, be sure to save it so you can easily run it again at a later date.
If you are not familiar with the process for saving your scan in the Advanced Scan Workbench, we recommend accessing our first Writing Scans Tutorial, which will walk you step by step through saving your scan.
Learn More
Now that you've learned some techniques for troubleshooting scans that get too many results, check out our third Troubleshooting Scans Tutorial to learn more about how to improve the speed of a slow-running scan.
For more in-depth information on writing and troubleshooting scans, please check out our Writing Scans and Troubleshooting Scans articles in the Support Center.